May 19, 2014
I guess you can say I started off my Australia, New Zealand, and Singapore trip with a bang. On my first free day, I played
Royal Melbourne's East Course in the morning and Kingston Heath in the afternoon. I think it is rare when a person can play two top 100 courses in one day so I really made sure to enjoy each experience to the fullest.
"The Heath", as some locals called it, was designed in 1925 by Australian professional Dan Soutar. Bunkers were kept to a minimum when the course was built to see how it played. The 18 holes were built on only 50 hectares (most courses in the modern era are built on over 100 hectares). Soutar was paid a fee of 25 guineas plus traveling expenses from Sydney. He planned the course around the tenth hole, which is set among a picturesque avenue of gum trees. Soutar routed the course so you wouldn't have to play into the afternoon sun. The course was constructed by M.A. Morcom, who was the superintendent at Royal Melbourne.
While Alister MacKenzie was visiting Australia he was hired to offer suggestions on bunker placement. The course was 6,892 yards long when it opened, which is very long for the 1920s. In his 1926 report on the course, MacKenzie criticized it for being too long.
I knew, with a tee time of around 1:30 p.m. and with sundown schedule around 5:15 p.m., it was going to be tough to get a full walking round in. But, I am not in Australia often and didn't want to miss the chance. After grabbing a quick lunch while driving, I followed my Garmin to a very understated entrance - an unmarked gate on the side of the road. From the parking lot, the clubhouse doesn't stand out from any other, but once you are walking towards the fourth green, its elegance is on full display.
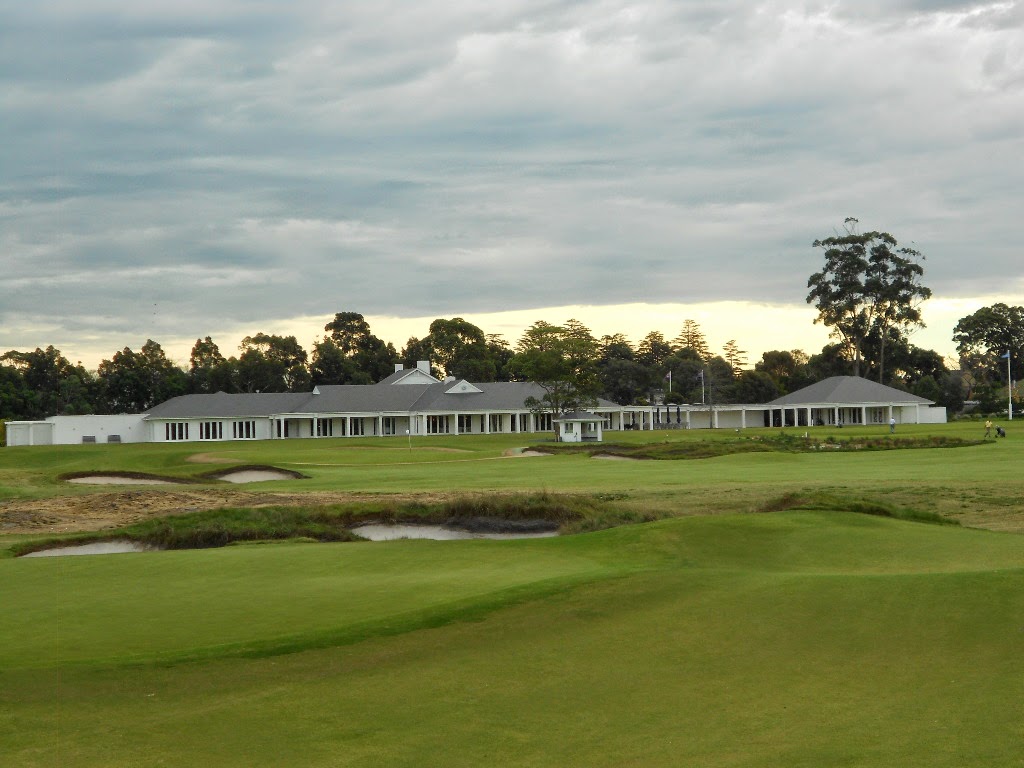 |
| The Kingston Heath clubhouse and restaurant. |
Once I checked in, I was escorted to the locker room and allowed to use the facilities as an honorary guest for the day. The locker room is what I have started to come to expect from the various top notch Australian courses. They include dark wood lockers and benches, as well as pristine showers and toilets with stacks and stacks of rolled towels.
 |
| The gentlermen's locker room. |
 |
| The club logo on the locker room door. |
As it was later in the day, I had no playing partner so was able to walk the round by myself. Being early winter in Australia, I couldn't have picked a more perfect day. When I teed off, it was 64 degrees with little to no wind, and partly cloudy, blue skies. There weren't many people on the course on this day so it did feel like I had to course to myself.
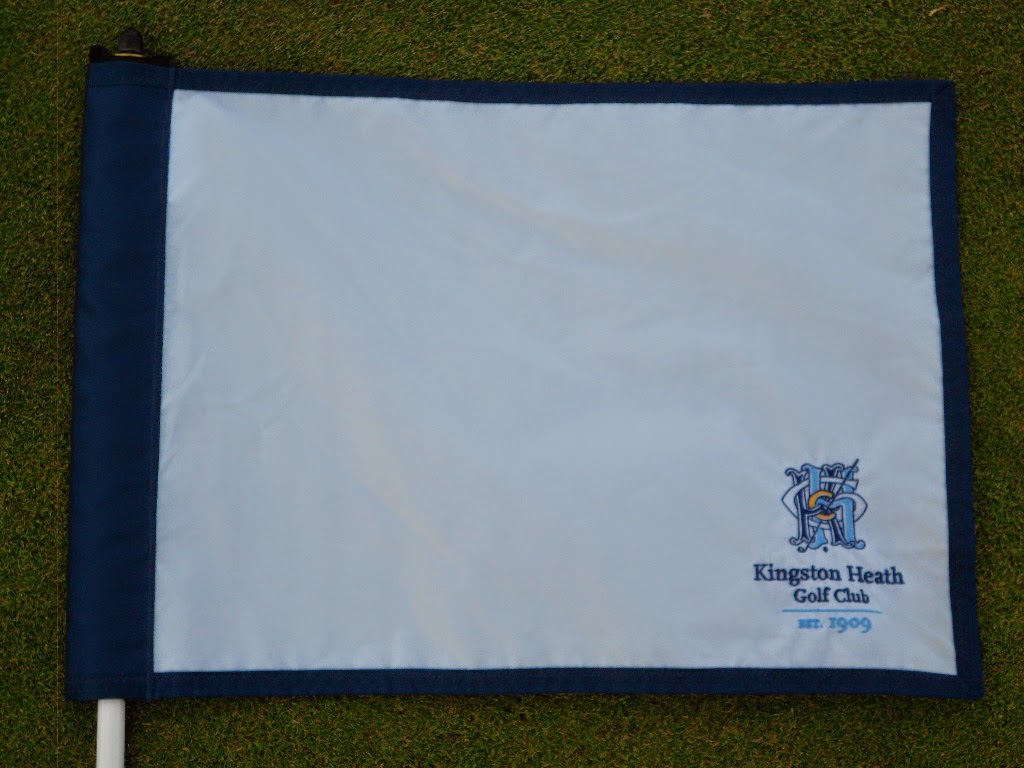 |
| The flag of each hole on the course. |
Kingston Heath appears numerous times throughout The World's 500 Greatest Golf Holes and receives quite a few accolades, all revolving around Hole #6. Among them are:
- Hole 6 is listed as one of the top 18 holes in all of Australasia and Japan.
- Hole 6 is also listed as one of the 18 hardest-to-putt greens anywhere in the world.
- Hole 6 received further accolades as one of the best Par 4s in all of Australia and New Zealand.
- Hole 6 is one of the best 18 holes ever designed by Alister MacKenzie.
The first tee looks out at a wide fairway, with the fairway from #4 to the right adjoined to it, giving giving an even bigger presentation of the first hole. It is a Par 4 that plays 418 meters. To score well at Kingston Heath you really need a good start over the first six holes. The ideal drive on this first hole is a fade down the centre.
 |
| A look down the fairway from the 1st tee. |
 |
| A look into the 1st green from 150 yards out. |
As long as you hit the fairway on your drive, a mid iron to the front left quarter of the green leaves an uphill putt and a very good chance for birdie. You do want to be cautious of those bunkers on the front right. They are much more high on the green side than they look from mid fairway. I took a closer photo of the green to try to show just how high those sand traps are to escape.
 |
| If you find yourself in the front right bunkers, par is going to be difficult to achieve. |
From my understanding, this is a newly lengthened hole, playing 351 meters. If you hit a strong three wood, it is ideal to use and place your shot to the right side of fairway, avoiding the traps on the left. The scrub brush that crosses the fairway shouldn't be an issue unless you badly mishit your drive.
 |
| A look down the fairway from the 2nd tee. |
 |
| A look into the green tucked into the back left corner. |
A good drive down the middle and away from the traps should leave you with a wedge to the front or an eight or nine iron to the back of the green. Again, that green side trap is much higher in person than it appears in the photo below. As close as the pin was to the trap, it would be very difficult to land the ball and have it stop near the hole.
 |
| A closer look into the 2nd green from 75 yards out. |
A\The 3rd hole is a short par 4 playing to 269 meters. The short length is adequately compensated for by the the small green and deep bunkers guarding it.
 |
| A look down the fairway from the 3rd tee. |
This is another hole you can put the driver away and utilize a 3 wood or hybrid and hit to the left side of the fairway. This provides an opening for a delicate pitch to a very firm green and hopefully another birdie.
 |
| A look into the green from 80 yards out. |
The 4th hole is a Par 4 that plays to 357 meters. A drive down the left side of the fairway is ideal as it leaves a good angle to attack the green with a wedge. The alternative is a long iron short of the fairway trap on the left.
 |
| A look down the fairway from the 4th tee box. |
If you hit your drive to the center of the fairway, a fade is probably needed to avoid the traps on the right, as well as hold the green. The greens were very firm on this day and was a common theme throughout.
 |
| A look into the 4th green from 75 yards out. |
One of three great par three holes at "The Heath", it plays to 173 meters. The best shot is over the traps to the front side of the very sloping green. The left trap is deadly.
 |
| A look into the 5th green from the tee box. |
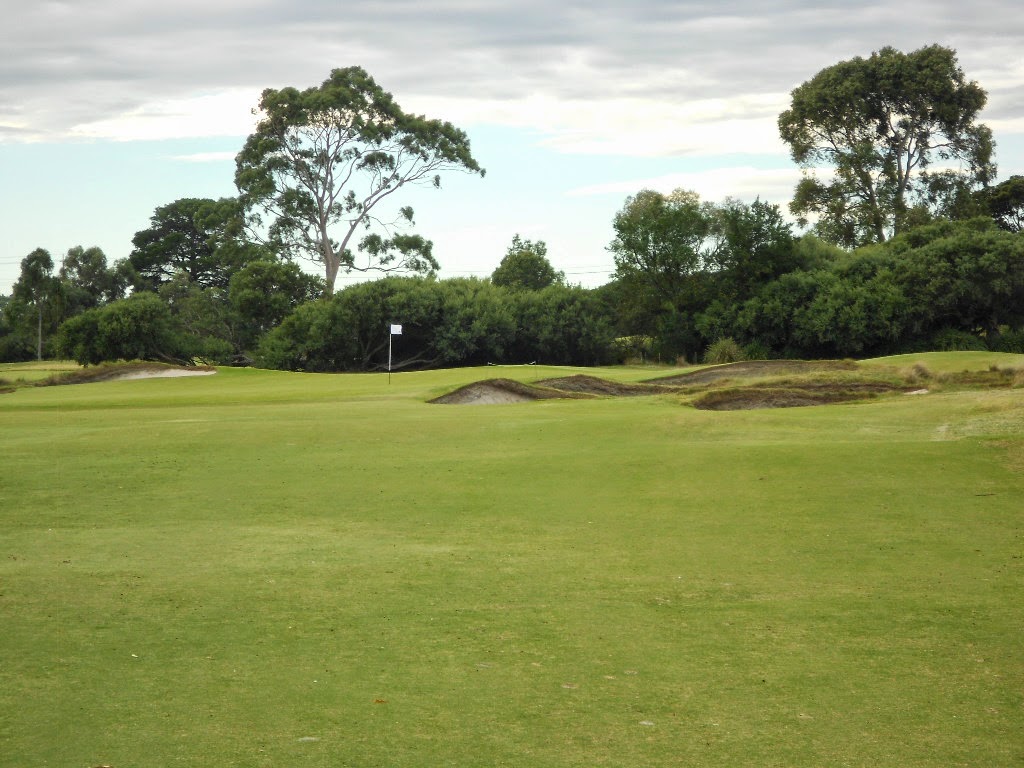
As noted towards the beginning of this blog, Hole #6 is the standout hole with accolades as one of the best holes in this part of the world, as well as one of the hardest 18 greens to putt anywhere in the world.
 |
| A look down the fairway from the 6th tee box. |
The 6th hole is a long par four, playing to 393 meters and plays back towards the clubhouse. A narrow drive between traps right and left will get over the small hill. From there a fade to center right of the green, avoiding bunkers and heavy rough on the side of the green should set up nicely for a par. It definitely held true in my case as it was one of two 3 putts I had all day.
 |
| A look into the 6th green from 120 yards out. |
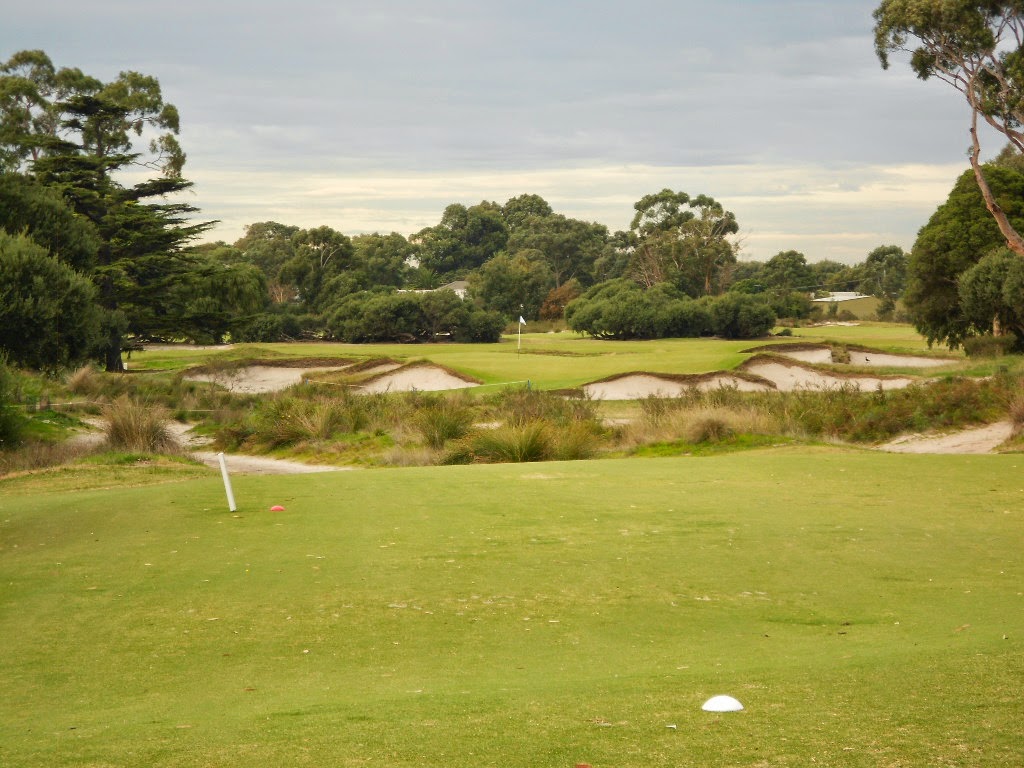
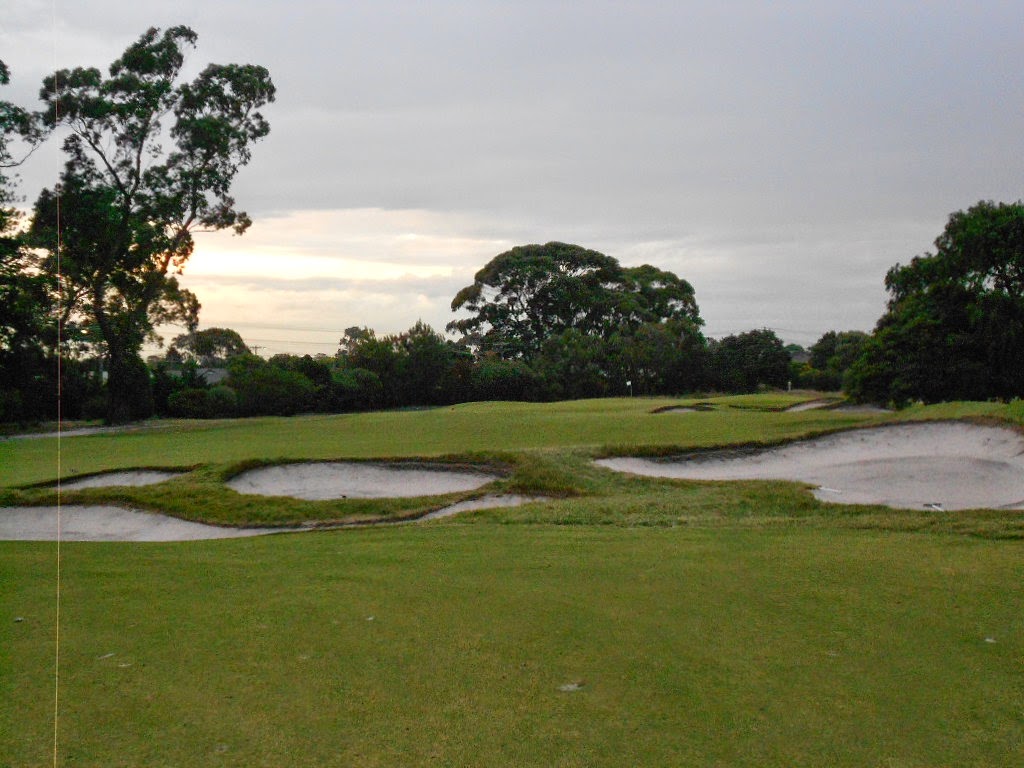
The par five 7th hole plays to 462 meters. Drive down the left centre of the fairway, short of the cross bunker.
 |
| A look down the fairway from the 7th tee. |
Be careful not to go too far left or the bunkers will keep you from a green in regulation most likely.
 |
| A closer look at the cross bunker mid fairway. |
Ideally, you want to pass the small swale at the entrance of the green. Any shot short of the swale is very difficult to judge. This hole also has lots of sand around it so a straight hit into the green is crucial.
 |
| A look into the 7th green from 125 yards out. |
One thing I have definitely gained experience from playing while in Australia is the blind tee shots. The 8th hole, a 398 meter Par 4, is a blind drive that will likely leave all but the longest of hitters short of cross bunkers.
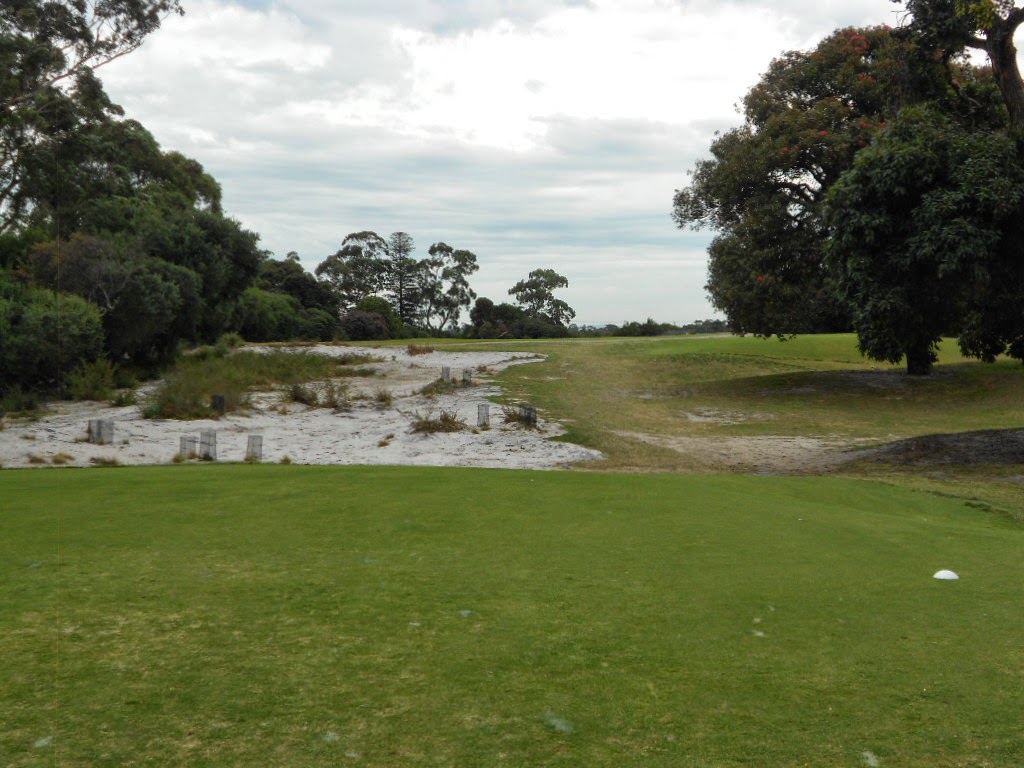 |
| A look down the fairway from the 8th tee box. |
 |
| A closer look at the cross bunkers just past the top of the hill. |
The 8th green is Kingston Heath’s only double green, which joins the 16th hole. The green is fairly flat.
 |
| A look into the green from 100 yards out. |
The 9th hole is a Par 4 that plays to 330 meters. You have a very tight entrance to this blind fairway, between thick tea trees. You probably want to put your driver away, opting for a long iron or hybrid for the tee shot.
 |
| A look down the fairway from the 9th tee box. |
A shot to the right side of the fairway leaves a wedge to the green. This is a demanding hole in a strong northerly wind. Also, on this day, the pin was tucked in the far left rear corner. This made the drive to the right side of the fairway even more crucial.
 |
| A look into the 9th green from 130 yards out. |
Below is the approach shot you will be looking at if you hit to the right side of the fairway.
 |
| A look into the green from the right side of the fairway at approximately 60 yards out. |
The 10th is a Par 3 that plays to 127 meters. The trick here is trying to feed the ball over a ridge that runs across the middle of the green. Any shot landing over the ridge will be lucky to stay on the green that slopes off the back.
 |
| A look into the green from the 10th tee box. |
The 11th is a par 4 that plays to 380 meters. A set of bunkers in the center of the fairway forces you to play left, leaving a mid iron to a very firm, small green. Down wind, a wood or a long iron to the right of the trap is likely the best play.
 |
| A look down the fairway from the 11th tee box. |
From the tee box, the green is located a fair distance off to the right and is a slight dogleg.
 |
| A look down the fairway towards the green at the turn in the dogleg. |
A beautiful tree sits behind the 11th green. Not only does it give a mark to aim for from the long fairway, it makes for a nice photo for my blog so I shot a vertical and horizontal photo of it framing the green.
 |
| A look onto the 11th green from the backside of the green. |
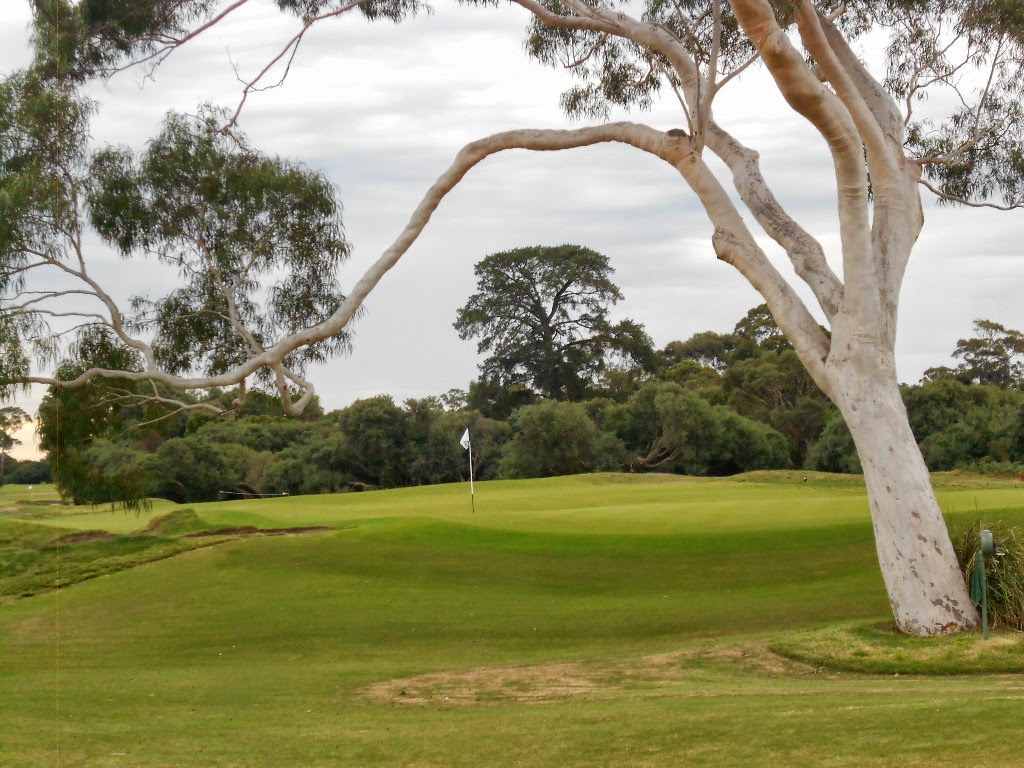 |
| A look onto the 11th green from the backside of the green. |
Number 12 is a par 5 that plays to 509 meters. An extra 60 meters were added to this par 5 just a few years ago from my understanding. A drive left of the huge bunker in the centre of the fairway is the shortest way to a well-protected small sloping green in calm conditions.
 |
| A look down the fairway from the 12th tee box. |
After a straight drive down the center of the fairway, a fairway wood is needed to carry the cross-bunkers.
 |
| A look at the cross bunkers from mid fairway. |
With your third shot, you want to aim for the front left of the green, preferably with a fade so the ball can roll up towards the flag.
 |
| A look into the 12th green from 100 yards out. |
The 13th is a 324 meter, par 4. Position is important on this fairway and depends on the different hole positions. I hit a driver down the left side and from there, I found myself in good shape to hit a wedge into the green.
 |
| A look down the fairway from the 13th hole. |
The course pro notes that the most difficult hole position is front right. I am glad the pin position this day was the back left. As you can see, the front right put the pin very near this sand trap and on a slope downward away from the trap. That would make for an awful time trying to hit over the lip of the trap and landing softly enough it stays near the hole.
 |
| A look onto the green from just behind the front right, green-side sand trap. |
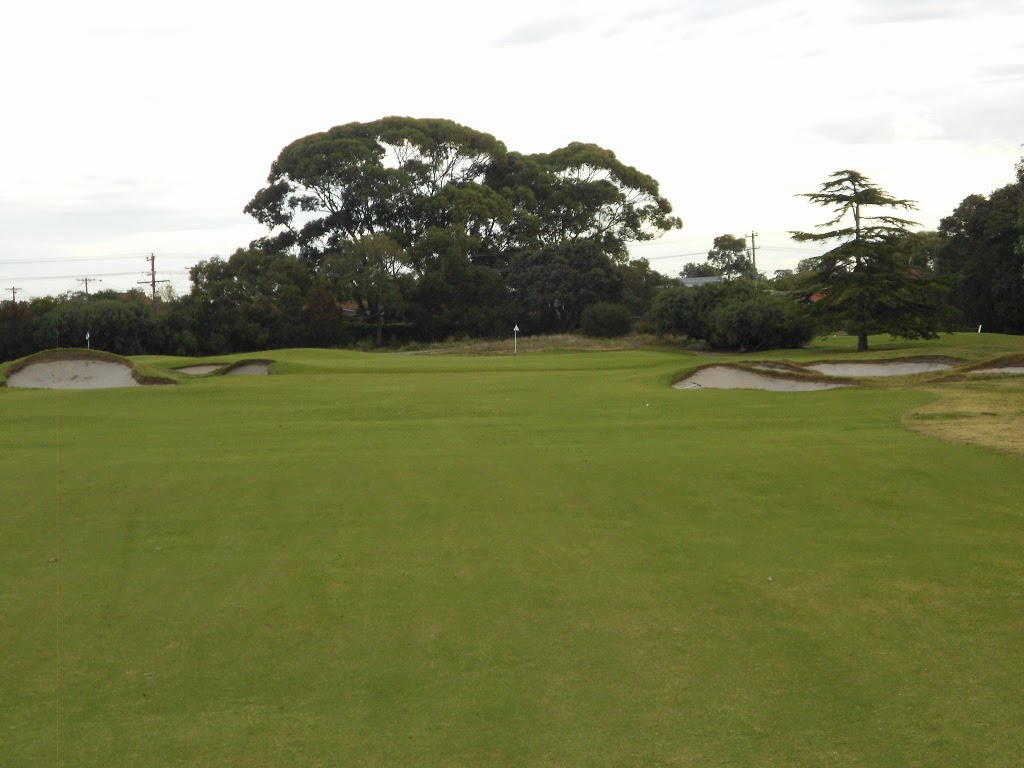
The 14th hole is a par 5 that plays to 516 meters. This is the last par five on the course. The green is reachable in two with a strong northerly wind.
 |
| A look down the fairway from the 14th tee box. |
After a big drive, followed by a three wood down the right side, you can catch the down slope and run onto the green. Just make sure to stay away from the large, steep sand traps on the right.
 |
| A look down the fairway from the right side fairway bunkers. |
Into a southerly wind, it is unlikely you will be able to be as aggressive. A long iron and a wedge from the left side should still allow you to get on in regulation. Note the deep and numerous sand traps on the left side of the green in the photo below.
 |
| A look into the 14th green from 100 yards out. |
Once I arrived at the 15th tee box, it started to get dark quickly. I had to open my camera shutter lens more than I am comfortable with, as well as increase the setting to a longer exposure. From there, I had to balance the camera on the top of my putter to keep it still so I could attempt to take a non-blurry photo.
 |
| A look into the green from the 15th tee box. |
This is one of the best par threes I have played and I enjoyed it as much as the
5th at Royal Melbourne West. It is uphill to a green 142 meters away, that is protected in front and to the right by extremely steep bunkers. The middle of the green is the only place to land your ball on this hole and keep your sanity.
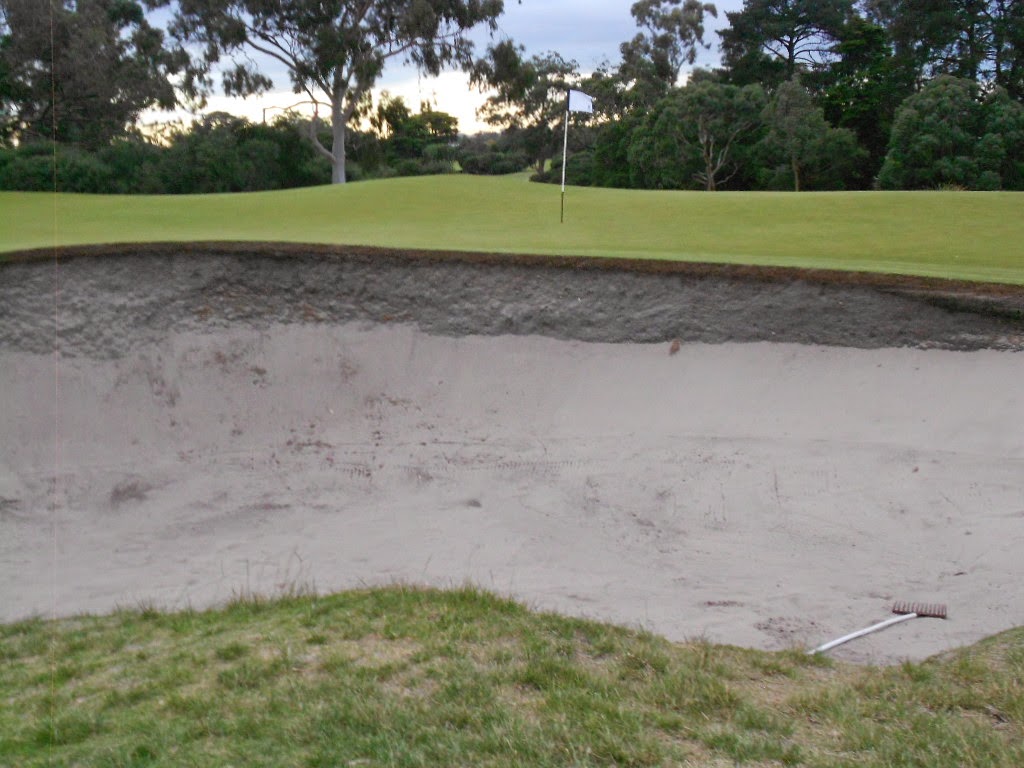 |
| A look onto the green from just behind the right bunker. A tough shot indeed! |
To get to the 16th tee box, you leave your cart or trolley at the cart path and walk 50-60 feet down a hill. If you are in a group of two or more, one person wants to stay at the top of the hill to serve as the spotter so you know when it is ok to proceed.
A very difficult finish at Kingston Heath starts here with a par 4 that plays to 391 meters. I hit my three wood to the blind fairway here because I was unsure how far it was going to roll after clearing the hill which slopes away.
 |
| A look up the fairway from the 16th tee box. |
Once you clear the hill, your ball is probably going to run a long ways back down, setting up a great view of the green.
 |
| A look down the 16th fairway from the top of the hill. |
The green slopes from right to left so you will have to determine the best shot for you depending on pin placement. On this day, it was a fade into the green. Not only did it jeep me away from the right, green side sand traps, but it also let the ball land at the bottom of the green and trickle towards the hole.
 |
| A look into the green from 140 yards out. |
You can see by the photo above just how dark it was by the time I reached 17. When I drove my ball on 16, I never saw it clear the hill because it was so dark. Luckily, I hit a straight drive and it was found easy enough after clearing the hill. Below are the photos with my camera at maximum open aperture and the longest open shutter time I could manage to get at least a half decent shot. Even with the camera resting on the putter, my shot from the 17th tee box is still slightly blurry. It is why none of the photos of 18 turned out.
 |
| A look down the fairway from the 17th tee box. |
The 17th is a par 4 that plays to 421 meters. Much like the first hole that shares a fairway with the fourth hole, the 17th is a fairly open fairway which doubles with the eighth hole. A drive to the bottom of the slope leaves an approach with a mid iron in calm conditions or likely a long iron into the wind. The green has many subtle breaks and also slopes away.
 |
| A look into the 17th green from 200 yards away. |
Unfortunately none of my photos of the 18th turned out in a quality I did not want to include on this blog. I simply couldn't hold the camera still enough on my putter and would have needed a tripod to make a photo worth posting.
The finishing hole is a par 4 that plays to 391 meters. A drive to the right of the huge deep bunker on the left side of the fairway is the best play. This will allow a mid to high iron to the green – which is very firm and well protected by sand traps and deep crevices. The 18th is a quality final hole but unfortunately it was the only hole I didn't play because it was just too dark.
Overall, Kingston Heath lived up to all my expectations of what a top 30 golf course in the world should be. The course was in fantastic shape, the staff was very professional and cordial, and I had a hell of a fun time playing it. A win on all fronts and I recommend it if you find yourself in Melbourne.


No comments:
Post a Comment